logo

Herringbone bail pit

Topics

4 min read

Efficiency Milking position Zig-zag rump rails The first bail Nib along pit wall The pit

The design of the milking bail, pipework, and pit in dairy farming is crucial for the safety and comfort of both cows and workers. This page outlines ways to ensure optimal cow flow and worker efficiency in the milking process. Key aspects include proper angles for milking positions, the use of zig-zag rump rails, specific design considerations for the first bail and pit wall, and guidelines for pit dimensions. By paying attention to these details, you can reduce animal health costs, increase worker safety, and lower injury risks, resulting in a more productive and humane dairy operation.


The design of the milking bail, pipework and pit is an important factor in keeping cows and people safe and ensuring good cow flow.

Benefits of getting it right include decreased animal health costs, increased worker safety and comfort, and decreased injuries.

Key points to improve efficiency and cow flow

  • A mirror for checking yard situation and backing gate placement.
  • Exit and backing gate control in multiple places in the pit.
  • Meal feeders divided into two sections, to feed half a row at a time.
  • Clear pit floors by providing convenient storage space in the pit.
  • A storage cabinet in the pit area for scissors, RMT kits and spray paint etc.

Cow angle – milking position

The angle cows stand on the milking platform at determines how much width each milking position requires.

For optimum cow flow:

  • position cows at an angle of roughly 45-55°
  • wide cluster spacing aids cow flow – at least 700mm
  • breast rail height 760mm for Friesian, 700mm for Jersey
  • adjustable breast rail


Breast rail is too high, disrupting cow flow and preventing cows from rowing up properly.


Cow spacing on a herringbone platform.

Zig-zag rump rails

Zig-zag rump rails are a recommended alternative to straight rails and are designed to control the cow’s position and alignment with the cluster. The aim is to produce a faster, more even milking, and better cow flow.

The zig-zag rump rails help by stopping cows getting too close to the pit edge and stepping back into space, which can be a frightening experience for them.

For zig-zag rump rails to work well

  • The rail should be 800-950 mm high
    • Lower zig-zags may catch on cows’ legs when entering the platform and dig into their udders when they stand in the milking position. The kick rail should be 200mm below.
  • The milk line should have the same centres as the zig-zag rail
    • If the centres are 760mm or less, allow 360-400mm width across the rump.
  • The breast rail needs to allow movement
    • Enough movement to accommodate cows when they are heavily in-calf as with a zig-zag rail, they cannot adjust their space by sliding along the rump rail.
  • The zig-zag should be in line with the edge of the pit.
    • Otherwise, milkers may have to reach under the kick rail to apply cups.

A zig-zag rump rail will help cow alignment. Make sure it is in line with the edge of the pit.


Zig-zag rump rails.

The first bail

The design of the first bail in herringbone dairies has an important effect on cow flow. If uncomfortable, cows will not want to be the first to enter the dairy. It is also the point of exit from the dairy, so needs to be designed to allow an easy exit.

Keep the following points in mind

  • The first bail space should be up to 200mm larger than the others. If it’s too tight, and the dairy has zigzag rails, replace the first two zig-zags with a section of straight rail.
  • Make sure the first bail allows the cow to stand comfortably without any pipework in her face, and without the possibility of getting her head caught between any rails.
  • Make sure the uprights around the first bail don’t obstruct the exit from the dairy as this will cause cows to back up to negotiate a way around them, hindering cow flow.
  • The position of the hinge post for the front gate can restrict the size of the first bail. The hinge post should be located in line with the edge of the pit, and zig-zag rails should not angle back to the hinge post.


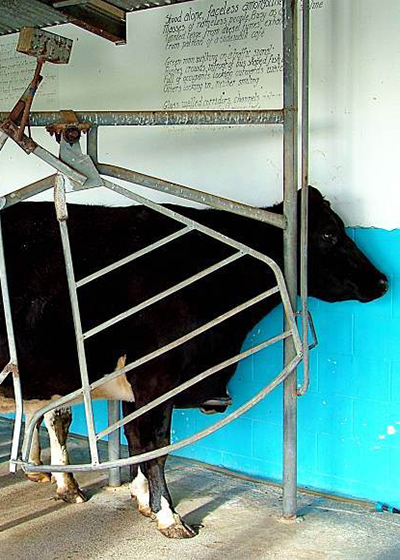
Uncomfortable first bail, also obstructs exiting.


Key herringbone measurements.

Nib along pit wall

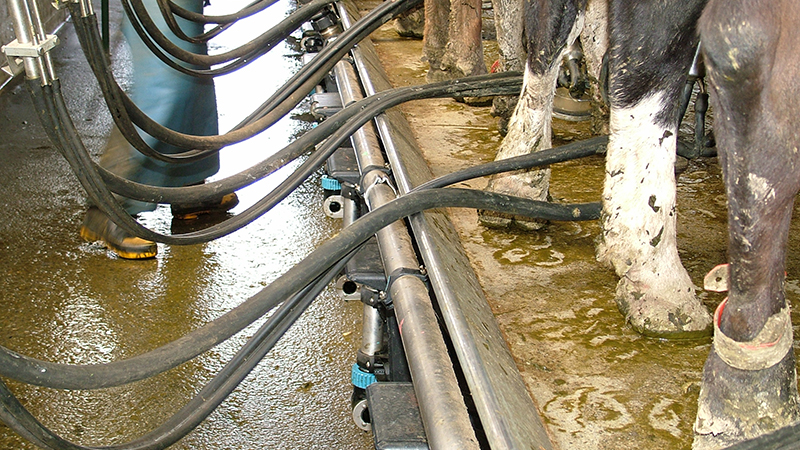
A nib along the edge of the pit stops cows slipping into the pit and is essential with straight rump rails. One slip can make a cow nervous for future milkings. Keep the following points in mind:

  • Use a 20mm steel pipe with a 20-30mm gap between the pipe and the concrete. Support the pipe every 800mm.
  • High concrete nibs are not recommended as they interfere with cluster placement, and cows tend to stand on them.


If a nib is too high it can interfere with cluster placement.


Cows walking off-centre because no nib installed.

The pit

The pit is the area of the dairy where milkers spend most of their time and should be designed for milker comfort, safety and ease of movement.

Pit dimensions

In general, pits are between 850mm to 1000mm deep.

  • The most ergonomic height to work at is between hip and shoulder, 850-1000mm is just below waist height for most milkers.
  • It is better to build a pit too deep rather than too shallow. Deeper pits can be adjusted for shorter milkers by using matting or some form of platform.
  • Deeper pits allow better visibility of teats and udders and are generally better from an OSH perspective as less bending is involved.
  • Pit walls should be angled, with the pit narrower at the top, so feet can be under the bail and the milker can comfortably get close to the cow.
  • The platform should slope away from the pit by 2-3%. This ensures water and effluent flow away from the pit.

Pits are generally 1400mm–1800mm wide.

  • The use of swing arms to improve cluster alignment helps make wider pits possible but they are still slower to operate.
  • Greater width means more walking is required, but the milking area is less cluttered.

Pit floor

The surface and slope of the pit floor has a big influence on how tired those working in the dairy will feel at the end of milking. The pit floor drainage can be an OSH issue.

  • The pit floor should be raised 45mm in the centre, falling to the pit walls. This raises the heels and eases the strain on the milkers’ calf muscles.
  • Soft flooring e.g. rubber matting (or soft footwear) can greatly improve fatigue and the strain on joints from standing on concrete for long periods.
  • Keep non-slip flooring and steps clean to prevent injuries.


Pit dimensions diagram.

Last updated: Sep 2023
Share:
Tags related to “Herringbone bail pit”

Related content

Herringbone entry & exit

Milking

2 min read

Handling facilities

Milking

2 min read

Blueprints Building

Milking

7 min read

Drafting systems

Milking

2 min read

Electronic ID

Milking

2 min read